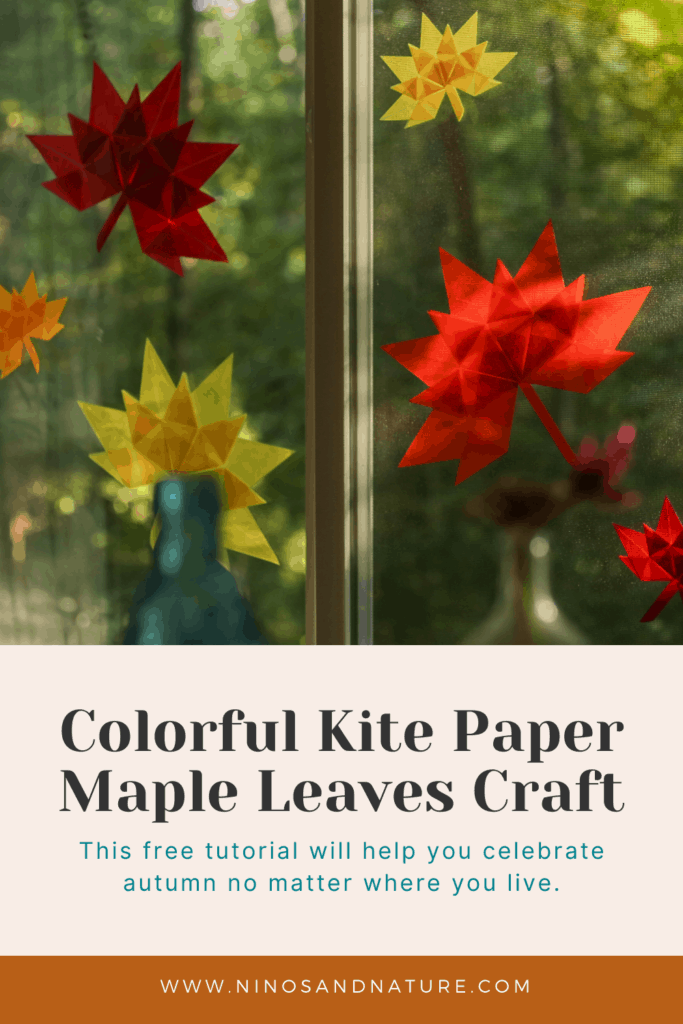
In this post: Learn how to make these colorful kite paper maple leaves! This free tutorial will help you celebrate autumn no matter where you live. Bonus? You can turn this into an amazing opportunity to celebrate Spanish while you craft with your kiddos.
Fall is officially here, and although our leaves aren’t changing in Virginia just yet, these origami maple leaves are giving me all the autumn feels. Origami paper leaves are a beautiful addition to any window display, and your children will love this autumn craft. If you have never used kite paper before, now is the time to jump in! This is actually one of the first kite paper crafts I have ever made, so any beginner can make these. Your children will love crafting alongside you, and it is an amazing opportunity to bring a hands-on Spanish craft into your learning at home.
What do you need:
You can watch this video to learn how to make these beautiful Kite paper maple leaves, or keep reading for full instructions!
Step by Step Instructions: How to Make Origami Kite Paper Maple Leaves:
You will need five folded segments for one maple leaf. First, get five squares of kite paper in any color of your choice. Begin working with one at a time. Fold in half diagonally.
Fold the bottom triangle up and over the sides that you just folded in.
Open up the sides so you can tuck the bottom triangle underneath them. Then close the sides over it.
Turn your paper so the triangle point is facing you. On one side, fold the top point in towards the center line. Repeat on the other side.
This is the tricky part, but you can do it! Open up one side of the small triangles you just made and unfold your paper twice. Press to fold the top small triangle back down, and double the paper over onto itself to create another small triangle flap. You already have all the lines creased, you just need to follow them. Once you have your smaller triangle all lined up and creased together, fold it down towards the top point of your kite. Repeat on the other side
Once you have done this on both sides, you can fold those outer triangle flaps down. You’re almost done with one section of your leaf! Now open your folds up slightly to put glue down on the inside, this will keep your leaf nice and together.
You have one section of your leaf all made! Repeat steps 1-8 four more times so that you have five sections total for one maple leaf.

Time to glue it all together. You will glue one section on top of another, overlapping the bottom side and the triangle section that is sticking out. Work until all five are glued together.
Add your stem! Fold a length of kite paper several times over to form your stem and glue it securely. Cut the bottom edge at an angle. Glue it onto the back of your leaf.
Use a roll of tape (or two!) on the back of your leaf to stick it to your windows or doors. Now make as many as you want and enjoy your fall decorations!
Now that you have your beautiful maple leaves, it’s time to turn this craft into an engaging Spanish lesson for your little ones. Here are some Spanish words you can use with your children while you make this fun autumn craft.

Hoja (oh-hah) – leaf
Arce (ahr-seh) – maple
Hoja de arce (oh-hah deh ahr-seh) – Maple leaf
Plegar (pleh-gahr) – to fold
Pegamento (peh-gah-mehn-toh) – glue
Vamos a plegar el papel para hacer una hoja de arce (bah-mohs ah pleh-gahr ehl pah-pehl pah-rah ah-sehr oo-nah oh-hah deh ahr-seh)
Looking to bring Spanish into your family’s everyday outdoor adventures? I offer a variety of nature based Spanish courses and resources for kids and families of all ages. They are perfect for bilingual families and Spanish learners, offering engaging and comprehensive resources to help everyone learn more Spanish at home.
Bring the joy of Spanish learning into your home today with these engaging, hands-on resources!
Like this post? Share & Save it!
